CDL School Bus & Passenger Test 2026: Printable Cheat Sheet (PDF-Style)
You passed General Knowledge. You passed Air Brakes. You even passed the Passenger endorsement. Then the DMV hands you a separate test booklet just for the School Bus (S) endorsement, and you realize it covers an entirely different set of rules — railroad crossing procedures that will get your license revoked if you skip a single step, blind zones where a child can disappear entirely, and a pre-trip inspection checklist with items no freight truck driver ever thinks about.
The CDL school bus endorsement test has 20 questions. You need 16 correct to pass. It is not a general knowledge exam — it tests specific federal and state regulations that only apply to school bus drivers. The questions target the moments where a mistake kills a child: loading and unloading students, crossing railroad tracks, and managing the danger zones around the bus.
This article is your printable cheat sheet for the 2026 exam. It covers the hardest test topics — the railroad crossing stop sequence, the student danger zones, the 8-light warning system, and the school bus pre-trip inspection — with every number and procedure you need to memorize. Print the summary table at the bottom and take it to the DMV parking lot for your final review.
Who Needs Both the P and S Endorsements
If you want to drive a school bus for a school district or contractor, you need two separate endorsements on your CDL:
- P (Passenger): Allows you to drive any vehicle designed to carry 16 or more passengers (including the driver) for hire. This covers city buses, motorcoaches, charter buses, and shuttles.
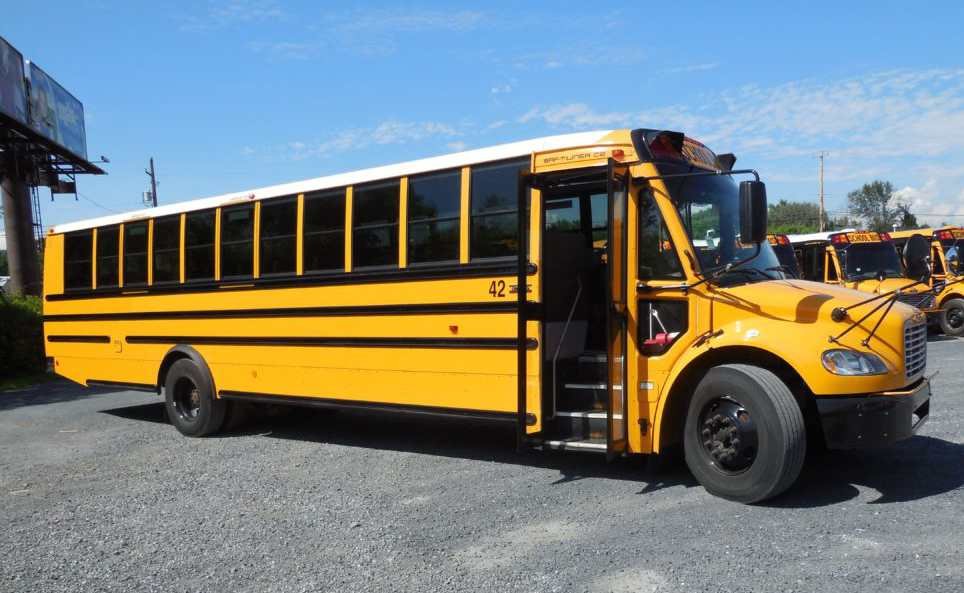
- S (School Bus): Allows you to transport pre-K through 12th-grade students to and from school or school-sponsored events.
The S endorsement requires its own written knowledge test and a driving skills test in an actual school bus. You cannot hold the S endorsement without also holding the P endorsement. The two tests cover overlapping but distinct material — the P test focuses on general passenger management, while the S test focuses on child-specific safety procedures.
The One-Page Cheat Sheet
Print this section. Every number on it has appeared on the real DMV exam.
| Topic | The Rule |
|---|---|
| Railroad Crossing Stop Distance | 15 to 50 feet before nearest rail |
| Danger Zone | 10 feet around all sides of the bus |
| Front Blind Zone | 12 feet directly in front of the bus |
| Amber Lights Activation | At least 200 feet before the stop (300 ft in some states) |
| Student Crossing Distance | At least 10 feet in front of the bus |
| Post-Route Child Check | Walk to the rear of the bus and check every seat |
| Emergency Evacuation — Driver | Driver is the last person off |
| Fueling | No passengers on board (no exceptions for school buses) |
| Gear Shifting on Tracks | Never shift while crossing rails |
| S Test Questions | 20 questions, need 16 correct (80%) |
Railroad Crossing: The Mandatory Stop Procedure
This is the most tested topic on the entire CDL school bus endorsement test. A school bus driver who fails to stop at a railroad crossing faces automatic CDL disqualification. The procedure is mandatory at every crossing, including those with functioning flashing lights, bells, and gates.
The Only Exceptions
A school bus does NOT have to stop at a railroad crossing when:
- The crossing is marked with an "Exempt" sign posted by the state
- A police officer or flagger is directing traffic to proceed
- The crossing is controlled by a traffic signal that is green and the track was recently abandoned with rails removed
Every other crossing requires a full stop. Active warning devices do not replace your obligation.
The Step-by-Step Sequence (Memorize This)
The test asks about the exact order. Get one step out of sequence and the answer is wrong.
- Check mirrors — Look for traffic behind you. Begin braking early so vehicles behind you have time to react.
- Stop 15 to 50 feet before the nearest rail — Far enough to see down the tracks in both directions. Close enough that no vehicle can fit between your bus and the tracks.
- Open the forward door and driver's window — You must be able to hear a train horn. This is not optional.
- Look and listen — Check both directions along the tracks. Listen for a train horn, crossing bell, or any unusual sound.
- Close the door before the bus moves — It is illegal to cross the tracks with the door open.
- Cross in a single gear — Do not shift while on the rails. Select a gear that can carry you all the way across without stalling.
- Check mirrors after crossing — Confirm no students were jostled or injured during the crossing.
Test trap: The exam will offer answer choices like "stop, honk, and proceed" or "slow down to 10 mph and roll through." Those are always wrong. The procedure requires a complete stop, an open door and window, and a visual and auditory check before proceeding.
The Danger Zones: Where Children Disappear
The danger zone is the area around the school bus where the driver cannot see students, especially small children. This is the single most important safety concept on the S endorsement test.
The 10-Foot Zone
The danger zone extends 10 feet from every side of the bus. Students must stay outside this zone at all times except when boarding or exiting. The test asks about the danger zone in two specific ways:
- "How far should students stand from the bus while waiting?" — At least 10 feet.
- "What is the danger zone?" — The 10-foot area surrounding all sides of the school bus.
The Front Blind Zone
The most dangerous area is directly in front of the bus. The driver sits high, but a child kneeling to pick up a dropped item or walking close to the front bumper is completely invisible. The blind zone extends 12 feet in front of the bus. This is why students must always cross at least 10 feet in front of the bus — never behind it.
The Behind-the-Bus Zone
The area behind the bus is another blind zone. Students must never walk behind the bus. If a student drops something near the bus, they must tell the driver — never reach under the bus to retrieve it.
The Driver's Hand Signal
When students must cross the road to board the bus, the driver uses a specific hand signal:
- Hold up your palm (flat hand, facing the student) — this means "wait."
- When it is safe: Give a thumbs-up or a "come forward" motion — this means "cross now."
- Students must cross at least 10 feet in front of the bus and make eye contact with the driver.
The test asks: "When should a student cross the road to board the bus?" The answer is always "only when the driver signals it is safe, and only in front of the bus."
Student Loading and Unloading: The 8-Light System
The 8-light warning system is the set of amber and red flashing lights on the school bus that control traffic around student stops. Knowing when each set activates is a guaranteed test question.
The Activation Sequence
- Amber (yellow) alternates activate — At least 200 feet before the bus stop (300 feet on highways or in some states). These warn approaching drivers that the bus is about to stop.
- Bus comes to a complete stop.
- Red alternates activate — The driver switches from amber to red. The stop arm extends. All traffic in both directions must stop.
- Students board or exit.
- Students clear the danger zone — All students are safely seated or at least 10 feet off the roadway.
- Red lights deactivate. Stop arm retracts. The bus proceeds.
Test rule: The driver must not move the bus until all students are accounted for and safely clear of the roadway. If even one student is unaccounted for, you do not move.
Loading Procedure
- Students line up at least 10 feet from the curb or roadway edge.
- The driver checks all mirrors before opening the door.
- Students board one at a time. No pushing or running.
- Once seated, the driver counts students against the route roster.
- Check mirrors again. Close the door. Deactivate red lights.
Unloading Procedure
- The driver checks mirrors for traffic and pedestrians before opening the door.
- Students exit one at a time and move immediately to the safe zone (at least 10 feet from the bus).
- Students who must cross the road wait for the driver's hand signal.
- Students cross at least 10 feet in front of the bus, never behind.
- The driver counts students as they exit and watches them reach the safe zone.
- Do not close the door or deactivate lights until every student is clear.
The "Danger" of Backing Up
School buses should never back up near student loading zones. If you must back up (dead-end road, turnaround required), do it before students board or after all students have exited and cleared the area. The test will present scenarios where backing up is the wrong answer.
Air Brakes (L)
Memorize critical PSI numbers and the 3-step L.A.B. check process.
School Bus Pre-Trip Inspection
The pre-trip inspection for a school bus includes everything a standard passenger bus requires plus additional items unique to student transport. The S endorsement test asks about these specific items.
Safety Door Alarm (Child Check System)
This is the most school-bus-specific item on the test. Every modern school bus is equipped with a child check alarm (also called a "No Child Left Behind" alarm or sleeping child alarm). Here is how it works:
- When the driver turns off the engine and opens the driver's window or door at the end of a route, an alarm begins beeping.
- To deactivate the alarm, the driver must physically walk to the rear of the bus and press a deactivation button located near the emergency exit door.
- This forces the driver to walk past every seat on the bus and visually confirm that no child is sleeping or hiding on any row.
The test asks: "What is the purpose of the child check alarm?" The answer: to ensure the driver physically checks every seat for sleeping children before leaving the bus. A driver who walks away without deactivating the alarm faces termination and criminal liability if a child is later found on board.
The 7-Mirror Check
School buses use a 7-mirror system that must be checked and adjusted during pre-trip:
- Left flat mirror — Shows the left side of the bus and the adjacent lane.
- Left convex mirror — Shows the left rear danger zone.
- Left crossover mirror — Shows the front left danger zone (the area directly in front of the bus and to the left).
- Right flat mirror — Shows the right side and lane.
- Right convex mirror — Shows the right rear danger zone.
- Right crossover mirror — Shows the front right danger zone.
- Interior rearview mirror — Shows the passenger compartment (used to monitor student behavior).
The crossover mirrors are unique to school buses and are specifically designed to eliminate the front blind zone. The test asks about them by name.
Required Emergency Equipment
Like passenger buses, school buses must carry:
- Fire extinguisher — accessible to the driver, fully charged
- Emergency reflectors or flares — at least 3
- First aid kit — stocked and accessible
- Spare electrical fuses (unless the bus uses circuit breakers)
School buses also require:
- Emergency exit signs — clearly marked and illuminated
- Body fluid cleanup kit — required in most states for student transport
- Seat belt cutter or emergency exit tool — accessible to the driver
Additional Bus-Specific Checks
- Emergency exits — The rear emergency door must open freely from both inside and outside. The alarm must sound when the door is opened while the engine is running.
- Stop arm — Must extend fully and retract fully. Both red lights on the stop arm must function.
- Flashing lights — All 8 lights (4 amber, 4 red) must flash in the correct alternating pattern.
- Crossing arm — If equipped, the crossing arm on the front bumper must extend when the door opens.
- Heater and defroster — Must be functional. A fogged-up windshield is an immediate safety hazard with students on board.
- Passenger compartment — Check for loose seat frames, sharp edges, protruding bolts, and broken grab rails.
Emergency Evacuation for School Buses
The test covers three evacuation types and asks you to identify the correct one for a given scenario.
Controlled Evacuation
Used when there is no immediate danger but the bus cannot continue. Examples: mechanical breakdown, flat tire on a quiet road. The driver directs students to exit calmly through the front door and assemble at a safe distance.
Partial Evacuation
Used when one area of the bus is at risk. Example: a small fire in the rear, a broken window. Move students from the affected area to a safe section or exit through a specific door.
Full Emergency Evacuation
Used when there is an immediate threat to all passengers. Examples: fire, submersion in water, fuel spill, collision with downed power lines. Use every available exit — front door, rear emergency door, side windows, roof hatches.
Key rule for all evacuations: The driver is the last person off the bus. After evacuation, count every student against the roster to confirm all are safely out.
Evacuation Decision Factors
The test asks when to evacuate versus when to keep students on the bus:
- Evacuate if: fire, smoke, fuel spill, submersion risk, bus stopped on train tracks, bus stopped in a live traffic lane where it cannot be seen from a distance.
- Keep students on the bus if: the stop is safe (off-road, visible to traffic), weather is dangerous (extreme cold, lightning), and rescue is on the way.
Prohibited Practices (High-Yield Test Items)
The S endorsement test loves to ask what you cannot do. Memorize these:
- No fueling with students on board. Zero exceptions for school buses. All students must exit the bus and stand at a safe distance before you approach a fuel pump.
- No backing up with students on board unless absolutely necessary and only after confirming the path is clear with a spotter.
- No driving with the door open. The service door must be closed and sealed before the bus moves.
- No allowing students to stand while the bus is in motion. Every student must be seated. School buses do not have standee lines.
- No leaving the bus with students on board. If you must exit (to check a crossing, to use a phone), students stay on the bus with the door closed.
- No rail crossing without a complete stop. Even if the crossing has active warning devices that are inactive.
- No talking on a cell phone while driving. This includes hands-free devices. School bus drivers are held to a higher standard than other CDL holders.
- No transporting unauthorized materials. No weapons, no flammable liquids, no unsecured heavy objects in the passenger compartment.
CDL School Bus Practice Test: 10 Questions
Work through these without looking at the answers. They mirror the real DMV exam.
School buses must stop 15 to 50 feet before the nearest rail at every crossing. The stop is mandatory regardless of whether active warning devices are present or functioning.
The danger zone is the 10-foot area surrounding all sides of the school bus. Students must stay outside this zone except when actively boarding or exiting. The most critical danger areas are the 12 feet directly in front of the bus and both sides along the rear.
Amber alternates must be activated at least 200 feet before the stop (300 feet on highways or in some states). They warn drivers that the bus is about to stop. Red lights and the stop arm are not activated until the bus is fully stopped and the door opens.
The child check alarm requires the driver to walk to the rear of the bus and press a deactivation button after each route. This forces a physical check of every seat to ensure no child has been left sleeping on the bus.
Students must never reach under the bus or enter the danger zone without the driver's permission. If something is dropped near or under the bus, the student must tell the driver immediately. The driver will secure the bus and retrieve the item or instruct the student when it is safe.
Crossover mirrors are mounted above the windshield and point downward toward the front corners of the bus. They allow the driver to see the area directly in front of the bus — the most dangerous blind zone where small children can be completely hidden from view.
The driver is always the last person off the bus during any evacuation. After all students have exited, the driver counts every student against the roster to confirm everyone is safely out. You do not delegate evacuation leadership to a student.
Active warning devices do not replace your obligation to stop. You must always stop at every railroad crossing in a school bus, open the door and window, look and listen in both directions, then cross in a single gear without shifting. The only exceptions are Exempt-signed crossings and police officer directions.
Unlike city buses, school buses do not have standee lines. Every student must be seated before the bus moves. Standing students are at extreme risk during sudden stops, sharp turns, or collisions.
The alarm is designed to force you to physically walk the length of the bus. You cannot deactivate it from the driver's seat, and you cannot delegate the check. Walk to the back, visually inspect every row and seat, press the button at the rear, then walk back to confirm the bus is empty.
How to Prepare for the S Endorsement Test
The written test has 20 questions. You need 16 correct (80%). Here is the study plan:
Step 1: Read Section 10 of your state CDL manual. This is the School Bus section. It is usually 15 to 20 pages with diagrams. Read it twice.
Step 2: Memorize the cheat sheet table above. Every number on that table — 15-50 feet, 10-foot danger zone, 200-foot amber activation, 12-foot front blind zone — has appeared on real DMV exams.
Step 3: Work through the practice questions above. If you scored below 80%, re-read the sections you missed. The test concentrates on railroad crossings, danger zones, and loading/unloading procedures.
**Step 4: Take our full School Bus Practice Test simulator for additional question variations.
Step 5: Schedule the driving test. The written test is only the knowledge portion. You must also pass a driving skills test in a school bus, which includes the full pre-trip inspection with the 7-mirror check, child check alarm, stop arm, and flashing light verification.
Conclusion
The CDL school bus endorsement test targets the moments where mistakes are fatal. The railroad crossing procedure, the danger zones around the bus, the loading and unloading sequence with the 8-light system, and the child check alarm are not abstract regulations — they exist because children have been killed when drivers skipped steps.
Memorize the cheat sheet. Practice the railroad crossing sequence until it is automatic. Walk through the pre-trip inspection on a real bus until the 7-mirror check and child check alarm are muscle memory. When you can score 90% on two consecutive practice tests, schedule your DMV appointment.
For more preparation, try our Free CDL Practice Test with additional endorsement questions, and check our Passenger (P) Endorsement Guide since most school bus drivers need both endorsements.
Frequently Asked Questions (FAQ)
Do school bus drivers have to stop at all railroad crossings?
Yes. School buses must stop at every railroad grade crossing, regardless of whether there are active warning devices. The only exceptions are crossings marked with an "Exempt" sign or when a police officer or flagger is directing traffic. Active warning devices do not replace your obligation to stop, look, and listen.
What are the danger zones around a school bus?
The danger zone is the 10-foot area surrounding all sides of the school bus. The most critical areas are the 12 feet directly in front of the bus (where small children are invisible to the driver), both sides along the rear of the bus, and the area behind the bus. Students must stay at least 10 feet from the bus at all times except when actively boarding or exiting.
How many questions are on the CDL school bus endorsement test?
The S endorsement knowledge test has 20 multiple-choice questions. You need at least 16 correct (80%) to pass. The P endorsement test also has 20 questions with the same passing threshold. The two tests are separate — you must pass both.
What is the safety door alarm on a school bus?
The safety door alarm (child check alarm) is a device that sounds an alarm when the driver turns off the engine at the end of a route. To silence it, the driver must walk to the rear of the bus and press a deactivation button. This forces the driver to visually inspect every seat for sleeping or hiding children before leaving the bus unattended.
When must a school bus driver use the 8-light warning system?
The driver activates amber alternates at least 200 feet before the stop (300 feet on highways in some states). When the bus stops and the door opens, the driver switches to red alternates and extends the stop arm. The red lights remain active until all students are safely clear of the roadway.
Can I drive a school bus with only the P endorsement?
No. To drive a school bus, you need both the P (Passenger) and S (School Bus) endorsements on your CDL. The P endorsement covers general passenger transport. The S endorsement covers school-specific regulations like student loading procedures, danger zones, and the 8-light warning system. You must pass separate written and driving tests for each.
Explore More Practice Tests
General Knowledge
The #1 starting point. Covers vehicle inspections & basic road safety rules.
HazMat (H)
Master the placarding tables, shipping papers, and TSA requirements.
Air Brakes (L)
Memorize critical PSI numbers and the 3-step L.A.B. check process.
Combination
Learn the 5-step coupling checklist and rollover prevention techniques.
Pass Your CDL Exam First Try
Don't guess. Practice with 1000+ real exam questions updated for 2026.
Start Free Practice